Showing posts with label home improvement. Show all posts

Thursday, April 04, 2019

Kid's Table Makeover (Ikea Laat)

What happens when your little girls grow up into tweens and teens? They want grown up rooms to match their new ages. My middle is turning 13 in a month and wanted her own room. We have a home office and we decided to turn most of it into her new room.  I'll show the full room remodel in another post, but I wanted to do a quick little tutorial on how to update the Ikea Laat Table into a cute, modern version of itself.

Easy Laat Table Makeover
The table itself we bought three sets of when the girls were little (they are so cute and came with tiny matching chairs). 

(Picture from Ikea website)
We used them for art projects, in the kitchen for tiny seating, and even lined them up for birthday parties tons of times for additional seating options for a crowd.

Seriously, we used these tables all. the. time!

Obviously 10 years later, our tables had seen better days. They had some crayon markings on them (got those out with a magic clean eraser) and they definitely had survived some bumps and bruises along the way (aka, they were very well loved).

Laat tables - well loved and more than a little worn out.
I wanted a quick makeover, and I knew the top was kind of shot, and decided that self-stick contact drawer paper (they come in a variety of cute styles and patterns) would be the easiest way to cover the top. I let my almost teen pick out the one she liked best and we cleaned off the top as best as we could.

The magic clean eraser did wonders on the crayon markings, but there were stills some dings and scratches along the top
My husband had the brilliant idea of flipping the top over onto the contact paper and tracing the exact shape in pencil (there are little notches at each corner).  

It really helps when you marry a genius.
Using two sides of the contact paper to "square up" I only had to draw a few lines to complete the shape. I cut the paper out with scissors, and then I used an X-Acto knife to do some fine trimming.

I used a sewing cutting mat to protect the kitchen table underneath.
After that my hubby helped me (it's good to have 4 hands for this part), we took a little bit of the sticker backing off and slowly unrolled the contact paper as the other person made sure it was going down in the right spots.

Hey, that's fitting quite perfectly!
Wow, that worked better than I anticipated.  Now it looks like a marble top.

Somehow it looks like it weighs so much more now...
The next step was to spray paint the wood bottom in a cute coordinating color for the room. She picked a light teal spray paint, and we took the pieces apart and laid them out in the back yard on some large cardboard pieces.  
*Actual paint used was Krylon Color Master Paint + Primer in Gloss Blue Ocean Breeze

This was coat #1 - I tried to balance the pieces to maximize paint-able space.
I started to spray paint, it was the weirdest thing. It was like the table had a force field impervious to spray paint.  It would sort of stick, but patchy-like. I got a little worried, and my husband decided to sand one of the smaller pieces to see if that helped.  It did a little, but not enough to make a big difference.  We let that dry and by the time we started to add the 2nd coat, it started to go on a little better. 

Doing light layers seemed to be the trick. I did end up using the whole can of spray paint to get the right coverage (thank you weird Swedish force field).

Once we let it dry for a few hours, it really started to look nice.

The only thing left was to put it back together.

The marble top slipped right back into the notches on the base no problem with the thin layer of contact paper
 ...and admire the results!
 
Hey, that's kind of pretty!
In the new bedroom, we had decided on getting rid of our old, red, 30 year old love seat that had been donated to us years ago, and replacing it with this smart little love seat that also had a fold out twin bed for sleepover guests.  I thought the new and improved Ikea table would make a nice "coffee" table for the love seat area.  When not in use, I keep it over by my desk for an extra work surface.


I love how it is matching elements in the rest of the room!
All in all, I am pleased how this little project turned out. 


We saved something from ending up in the dump, and now it has a brand new life in a "grown-up" teen room for many more years to come.


Wednesday, April 20, 2016

Kitchenaid Makeover - Vinyl Decals

I recently painted my kitchen.  We changed from a light spring green, to a beautiful aqua color called "Hawaiian Sky".  I absolutely LOVE it.  It's so peaceful and calming.  

"Hawaiian Sky" paint color is a Dutch Boy paint color, and I found it at Fred Meyer
Of course, as home improvement chain reactions go, I am now on the lookout for a few teal accent pieces to help tie the colors in the kitchen together and give some pop to the room.  Most everything in the kitchen is white (cupboards, appliances), including my Kitchenaid Mixer.  I thought, hey, maybe I can gussy this thing up!

Plain, white, kitchenaid mixer. I'll now call this "the before"
I have long admired some of the Food Network gals and their fancy hand-painted mixers, but the lofty price tag kept me at bay.  I went over to Etsy just to see what was available, and found some gals that make vinyl decals specifically for your Kitchenaid... and I decided I would TRY IT!  There were many styles to choose from, but since I like swirly, and filigree designs, I went for a shop called "Good Golly Graphics" because they could do the cool design I really liked, in the exact turquoise color that would go with my kitchen.

Fast forward a few days later, and I was so excited to get this little package in the mail.  It contained tons of decals, a page of detailed instructions on how to do this project, and bonus - some links to some YouTube videos for the visual learners like me.

Vinyl decals for my kitchenaid by Good Golly Graphics
I decided to lay the designs all out to see what I had:  The nerdy symmetrical side of me was immediately giddy to see that each design had a matching set on another page, only the opposite direction, which would end up giving you more variety in the long run on which way you wanted the design to go.


There were a ton of decals in the pack.  Very nice!
The first step was to clean your kitchenaid mixer.  Let's just say it had been a while. Who knew flour could get way back there?? I got out my trusty degreaser spray and scrubbed that baby until she shone like the top of the of the Chrysler building (random Annie reference for your amusement).  After you have a clean, smooth surface, you can begin to place the decals on the mixer.  Being a perfectionist, and nervous, I watch the link to the YouTube instructional a few times to get the gist of things.  I waited til the kids went to bed (no interruptions) , and then I excitedly started my project with the perfect amount of peace and quiet to think about my masterpiece! The first step is to cut out the designs, very close to the decal.

Individual vinyl decals for the kitchenaid
The trick with the kitchenaid, is that it is curvy in spots.  Okay, all spots.  Let's just say I don't think there is a truly flat, flat spot on the whole thing. Not only should you cut the designs out close to the vinyl, but if there are any leaves or swirls that go into the design itself, to clip down between the shapes (white sections of the design) and make some snips so that your design would be able to bend around curves.

The next step is to get some blue painter's tape (hey, I JUST happened to have that, I just painted my kitchen, how did you KNOW!?) and tape your selected shape at the top and press firmly a few times, making a flap of sorts.

My first decal.  I was so nervous and wanted to get it right the FIRST time.
So now that the tape is at the top, it will act like a "hinge".  Flip up the design and take off the stiff backing while basically holding it upside down.  The vinyl will stay on the bendable top layer.  Once the backing is totally off, the painter tape has kept your design exactly where you want it without shifting. 

The painter tape acts as a "hinge" so your decal stays in place while it's all sticky and vulnerable
Then you slowly roll the vinyl shape down over the mixer's curved surface, smoothing as you go down (no picture of this, I need both hands on the decal). Once in place, rub gently over the whole shape to help seal it to the mixer.  Then take the blue tape off (it comes right off, I used the same piece again and again).  Now you can pull off the top backing layer of the vinyl decal.  The trick is to pull steadily at a 45ยบ angle with even pressure.

The more flexible backing side comes right off and the design is now firmly on your mixer
This works out pretty fabulously!  Once you get the hang of it, this painter tape hinge thing is awesome for the bigger pieces with many small curls and swirls. Matter of fact, I thought for sure that the tiny little end pieces of the intricate designs might rip up when I removed the final backing, but to my surprise, even the smallest of tiny swirls stayed in place.  Moving up the side of the mixer, every time I picked a decal, I would find it's opposite design on the other sheet, cut it out, and set it aside for the other side of the mixer (so both would match and also so I wouldn't accidentally use that piece somewhere else)

Four pieces down - no turning back now!
I felt it was logical to do some of the largest pieces first, to make sure they would fit, especially up the sides and over the top, then I would go back and fill in with some of the smaller swirls.  I'm not gonna lie, I was a little stressed at making sure the design wasn't going to be too busy, that it had enough visual white space, and that the pieces looked like they went together. Taking your time and planning ahead are key. Luckily, the decals are kind of see through, so you could lay them out and see how they would fit with the one next to it.  The hardest part I think was the back rounded end of the mixer at the top. It was the most curvy and the trickiest to make sure the vinyl went down flat.

Holy cow, it's turning out so cute!!!
When I was totally done, I stood back and admired my handiwork. Hey, that turned out even better than I thought it would! I went paparazzi mode and took pictures from each angle. First side:


 Other side:

 Top:

Front:

Back:

 
I decided to put the Kitchenaid back on the counter, with the silver bowl back in place for the full effect.  You can see that I decided to leave the center part where the bowl sits white (I thought that gave it a nice contrast) and I can't believe how NICE it looks with my new aqua walls!  My hubby came home and was actually impressed.  He said it gave it "personality".


A designer look at a bargain price!
By they way, they have easier designs that you don't have to think too much about.  I saw a leopard print that had larger pieces that covered larger areas of the mixer all at once.  I think mine took longer to do because there were so many ways the pieces could go together, and it was all up to ME on how they looked...

So if you have an older mixer (before all the snazzy colors came out), or even if you have one of those newfangled colors, you can get some awesome decals for under $20 and try out a cool design that matches your kitchen.  Check out Good Golly Graphics because, not only can she customize the shown design into a ton of specialized colors (even silver and white), I found out she's an Army wife and doing this as home business while her hubby is deployed and she's keeping down the fort at home, so it's a great way to support the troops too. By the way, the exact design I picked is called "Flourish kitchen mixer swirl decal" and you can find it by clicking hereShe had a ton of colors to choose from.

Before                                                                                        After
I just love how it went from plain Jane to designer awesome in one evening.  The best part is, if I ever change my mind, the vinyl is removable and I can go back to plain white, or change it up with a new masterpiece if I wish. Plus, you don't have to go girly or swirly.  I saw designs on Etsy for every taste.  There were flame decals, nerd decals like turning your kitchenaid into a tribute to R2D2 or the TARDUS, fruits, tropical flowers, cherry blossoms, polka dots, Disney fun, animal prints - really you are only limited by imagination. Now get out there and gussy up your Kitchenaid mixer, stat!


Tuesday, November 27, 2012

Lightkeeper Pro

So it is that time of year when people start decking their halls.  You start out all Norman Rockwelly (sure, it's a word) with cocoa and Christmas tunes playing, surrounded by loving memories as you pull out your decorations from years past... reminiscing...sip of cocoa...reminiscing...hang a stocking... reminiscing... bobbing your head as Holly Jolly Christmas plays on... 

the goal in your mind....
Then suddenly, it all comes screeching to a halt when you realize half the lights on your pre-lit tree did not come on when you plugged them in just now. Either that or the brand new strand you bought last year (to replace the ones that didn't work the year before) - is in a hopeless half-lit ball on the floor which makes you think to yourself...hey wait a gosh darn minute WHY don't they make things last like they used to?  Arg.

Festive merriment quickly dissolves into tears and frustration as you jiggle the strand (like that helps), scour the line for burnt out bulbs, and eventually, storm off to the store for some replacement strands of lights as your cocoa grows cold.  

One light goes out, they all go out...
So in lieu of a night of peaceful decorating, the rest of your evening is spent trying to: rip out lights hard-wired into the tree, pulling bulbs out one by one, wrecking your fingertips in the process, secretly sounding like Yosemite Sam as your make up new swear words under your breath, and eventually giving up in disgust - carelessly throwing a whole new light strand over the broken old ones and saying "bah humbug"... that is, until NOW.

Hubby stumbled across something and brought it home.  I wasn't even sure what to make of it at first but I'm here to tell you, this could save your Christmas sanity.  Behold, I give you the best little gizzmo that actually lives up to it's promises... the Lightkeeper Pro.

God bless you light keeper pro.

It sounds too good to be true, doesn't it?  This thing that looks like a cross between a squirt gun, a taser, and a label maker is somehow going to fix your Christmas?  I can say now from experience a resounding YES.  By the way, I'm not on commission with the company or anything, I was just so shocked that it worked I had to blog about it.  This little thing is a wonderment to behold.   Talk about your multi-taskers, this baby has it all.  A bulb and fuse tester, an audible voltage detector, a bulb puller (to save your fingers), a light socket connector, a magical "quick fix trigger" and to top it all off, it comes WITH batteries.  For $20 bucks that's quite a deal. It will seriously pay for itself when it saves you from buying new strands every year.

How does it work?

Well that is the question of the century. My hubby, who is equal parts techie-nerd and geek, who happens to know a bit about currents, circuits, and electricity, was mystified by this thing at first.  We had a strand on a pre-lit tree where half the bulbs were out. They did not look burned out, but they were not lit.  We pulled one bulb out, tested it on the light keeper pro, then hubby put the tip of the gun in the empty socket, pulled the trigger, and bam, the whole strand lit up.  WHAT?  That's right.  Lit up.  That's why I called it the "magical quick fix trigger" earlier.

The light keeper pro in action
Still high on giddy fumes that it actually worked, we went scouring the interwebs to explain WHY it worked.  The best explanation came from an Amazon reviewer named Thomas Dibble (see review here).  You can also see it in action on their website here, or the best example and detailed explanation of how to use it can be found below on a news segment where they show you the different features actually working in real time.


You can test burnt out bulbs with it, replace just those and you are back in business.  You can also test the entire strand for current and discover where loose bulbs or burnt out bulbs may be.  My daughters had a mini pre-lit tree in their room they have been using as a night light all year, but it ended up burning out last week.  One pull of the trigger and it was up and working again in minutes. Now if you have a strand that is old, damaged, or all the bulbs are burned out in a section, this might not work for you.  Nor will it work on LED lights (though I just read they have  new tool just for those) but for typical and frustrating strand outages this thing works amazingly well.   Anyway, just had to pass this along to you guys.  I have a link at the top of my blog in "my favorite things" tab if you want to order one on Amazon.  How great will this be, when halfway through the Christmas season and your tree is already fully decorated but THEN a section goes out?  No need to disassemble the whole area, just a few clicks from the Light Keeper Pro and it's Happy Fa la la la lalidays once again.  Now go put on some Bing Crosby and lets get back to decorating. Hello Christmas sanity, I have missed you!


Friday, July 13, 2012

Decorate Clear Plastic Storage Drawers

A few years back my girls were down stairs opening gifts on Christmas morning when suddenly, they heard jingle bells! They ran upstairs to find Santa had left them a pink kitchen in their room!  They were so excited.  It was so realistic my youngest immediately tried to wash her hands in the sink and was shocked when no water came out. So cute.  Soon our little kitchen was overrun with piles of pretend fruits that spilled out onto the floor. Veggies, bowls, plates, and lovely little desserts that numbered so many that not even the mini shopping cart could hold them all. There was not any "counter space" to speak of where you could put the toaster and hand mixer and whip up imaginary culinary delights either, as the set just came with a pink fridge and a stove/sink unit.  I decided we needed some storage drawers to hold all the food and accessories in, and at the same time would also add the much needed counter space.  I went and bought some simple Sterilite storage drawers, and they looked so plain and drab next to the bright pink kitchen I knew I wanted to gussy them up.  I bought a 12x12 scrap book bundle in some coordinating colors to their room, and this is what I did:

Cute pink kitchen.  I always wanted one of these when I was a kid!
As you can see, it really turned this corner into a full kitchen area with plenty of "counter space".  We have a little white Ikea table with two chairs (not pictured) to the left to complete the dining area.  The drawers are completely chalked full of food, but the scrap book paper covers most of it up and makes it look nice and neat. If you want to see a side view of what the sets of drawers looks like, here's a different angle:

It really gives it a finished look!  The only thing I needed was to cut the scrap book paper to fit the drawers.  This was a little tricky at first.  Once I had a template made out to the right sizes, I used that to trace the other matching drawer sizes.  The gingham pattern really helped in this aspect, as I could match of numbers of lines.  The extra wide drawer set I used two pages together to make it extra long.  I lined up the pattern so it would look almost seamless.  After that I used strong double stick tape (long pieces that covered entire edges to try and hide the "taped" look) to attach the paper to the inside of the plastic drawers.  When you are looking at it you do not see big strips of tape.  I was very happy how it turned out.  By the way, the front of the drawers were a bit trickier than the sides.  The sides are flat and very easy to piece together.  The handle posed a curved/indented problem, so I only ran the paper up to where the handle started.


As far as durability, I wasn't sure how paper and tape would hold up with three busy girls and a lot of play cooking going on.  But I am pleased to say I did this project over 4 years ago and they have held up beautifully.  I think it helps to really seal the edges as close to the plastic as possible so there is nothing sticking out to catch on and rip.  Also I LOVE the versatility of this.  You can use this technique for cute storage in school classrooms, home offices, kid rooms, teen rooms, play kitchens, any where you have plain storage bins.  We'll make the world a cuter place one drawer at a time!

Monday, March 26, 2012

Excellent Painting Tips

So a few posts back I talked about taking one entire weekend recently to reorganized a spare room, thanks to the "exercise machine chain reaction of 2012", and part of gussying up the new room was to paint it.  When we first moved into this house, we had come from a townhouse with all white walls we couldn't touch.  I vowed that when we were homeowners, we would get some color up on the walls and make this place our own.  Flash forward to present day, and we have completed nine rooms that are fully painted, and I for one, have found some handy tips and tricks along the way I'd like to pass along.

Before you start painting any room, there comes the all important (and sometimes tedious) prepping the room for paint.  Start by taking off all the light switch and power outlet covers.  Then get yourself some brown or blue thick masking tape, and tape off all door frames, window frames, and closet areas.  Make sure the seal is tight so no paint can leak through.  Don't do the floorboards though, I have a GREAT tip for that.  See this little beauty below?  Well you will find it next to all the painting/tape supplies.  It is a great little invention that will save you time, AND many stains on your carpet.  The best thing about this is that it's TWO steps in one!!


Turns out this little baby is both tape (for the taping off the floor boards) AND a plastic drop cloth. Once you get it in place, the plastic then unfurls to reveal 24 inches of roomy plastic that acts as a drop cloth.  It's akin to a Christmas miracle in my book!

Tape and drop cloth in one!  GENIUS
This is so great because the tape and plastic are one unit, there are no gaps between the wall and the floor, thus NO drips can find your carpet.

Next, let me introduce you to my "little friends".  I am in LOVE with these two little gizmos.  Matter of fact, I could easily paint an entire room with them (and I have).


The 4 inch roller pad and the 1" trimmer pad - purchased these at Fred Meyer, but I'm sure you can get them anywhere.
Are they not adorable?  The 4 inch pad is possibly the best invention for painting a room I have come across.  See those little wheels along one side?  Well you use that to make perfectly straight lines.  It works awesome in places like the ceiling line, and between wall colors in the corners (if you are doing two color shades in one room).


Check out this bad boy in action.  Look how straight that edge is!  You just dip the pad into the paint tray, lightly wipe of excess, start a bit below where you want to be and move your way up to the ceiling line, and let the little wheels do the work for you as you roll merrily along.  (Another great tip is: If you are painting over another color, find some of the original ceiling color and with a medium brush, paint the ceiling color down 1-2 inches into the old color and let it dry as we have done here.  That way you are sure to get a perfect edge with the new color)

Here is a close up of the completed line:  Super straight and perfect.  I can hear all the OCD peeps out there clapping with glee.


Now onto the 1 inch pad.  These are stellar for edging around windowsills, floor boards, and sometimes small places like door frames or around outlets.  As long as you have the tape securely fastened to the wall, you can press this pad (sort of has a spongy quality to it) into the wall and really get into all the nooks and crannies for complete paint coverage.  I usually do a 3-5 inches off the base boards and then finish off the wall with a paint roller.


Here is a major TRICK I have learned with base boards, tape, and plastic.  Finish the wall of course with the roller but remove the tape and drop cloth soon after you finish.  Do not wait until the paint is completely dry.  If you do, there might be dry chunks that pull off with your tape and leave chips/holes near the base board.  Pulling it off while the wall is still drying is the BEST way to make sure you will get a clean, straight line.

By the way, speaking of rollers.  They have even done some improvements on these too in recent years! We've have been using a "paint stick" that seems like a roller paint brush at first, but the awesomeness here stems from the fact that the handle holds tons of paint that you suck up directly from the paint can!  This is fabulous because you can do entire walls without stopping for a refill.  They claim you can paint your walls in 1/3 of the time of regular rollers, and we can attest that it really is another great time saver.  

I have found them in the $25-$40 range at a few different stores and they have lasted through multiple projects as long as you clean them well.  These are also so great for painting ceilings or above your head.  Our bedroom has a very high, vaulted ceiling and we used this technique the whole time with little to no dripping (They do come with a "splatter shield" that fits around the roller that you can adjust at will to minimize splatters and leaks).  LOVE IT!

Now if you have never painted a room, or have not painted a room in a long time, I challenge you to go and try out some these new handy gadgets that really can help cut down on time.  

A quick new coat of paint can brighten up/change the outlook in any room, and that can help you get to your happy place just a wee bit faster.  Kids rooms, play rooms, even bathrooms are another great place to pick a fun color and experiment. Add some new bedspreads, or throw pillows, hang some new decorations on the walls or a new shower curtain, and it's like you have a whole new room.  So go get creative!

Monday, March 12, 2012

Chain reaction weekend

So sorry for the delay in posting this weekend.  I have 3-4 things to share but alas there was a chain reaction of a home improvement downward spiral that took the entire weekend to do.  It has  happened before in the "Plasma TV chain reaction" of 2007.  This time we sold a very large piece of exercise equipment that had been taking up half our spare room for years.  (In our defense, we bought it before the P90X craze where all you need is a pull up bar and some resistance bands).  After we sold it, the whole room was open to new possibilities.  That lead to cleaning out closets, deep cleaning the whole room, getting rid of bags of stuff, then deciding to paint, prep for paint, move heavy furniture, including a heavy computer desk and unloading 2 large book shelves of books to  make them light enough to move, then purging/sorting through books to sell, donate, or keep.

After painting (I have some great painting time saver tips to share in an upcoming post) we moved things back, cleaned some more, moved cabinets from the hall into this room, and cabinets in this room down the hall to make some extra towel/blanket storage.  This then led us to reorganize all towels, sheets, comforters, old baby blankets. Ug.  Then back to the, room reorganizing book shelves, making a craft/color area for the kids... it was a crazy domino effect for sure.  We worked from Friday afternoon, to Sunday night late.  There is a light at the end of the tunnel now, thank goodness and the room is looking much better, not to mention we will be using it much more, hooray!  Still got a few things left; hang curtains, get some cute decorative storage boxes, hang some art, etc.  But I think we are on the right track.   

Wednesday, October 17, 2007

Disaster Updates

So you're probably sitting on the edge of your computer chair, wondering if we ever did manage to get that double blue smurf stain out of the carpet... so I thought I'd give you an update: The short answer is Yes, and Hallelujah. The first stain came out great. The second stain, thanks to the power of prayer, elbow grease, tireless effort, and the miracle wonder that is Oxyclean is also completely gone! Also we've learned to toss an old towel over the new shop vac so any exhaust can still get out, just not back onto the carpets. ALSO, if you are a shop vac company shouldn't there be a very large warning on the box stating that giant exhaust spray might shoot out the back of the machine?? I cringe to think if we had been cleaning up vomit... does that mean a fine 3-foot mist of vomitness would spray out over the carpet? Yikes and yuk. My husband did say in the small print there is a small warning about that, but I think they should opt for a large yellow and orange disaster warning type sticker so at least you know what you're getting into. Do all shop vacs do this? Our is this just a special feature of ours? Looking back so far we are still not to the point to find the blue paint stain hilarious yet, but just yesterday I think I saw my husband smirk when he read my blog about it.
Secondly, the extra tickets... what did I do with them you ask? Well I attempted my first ever Ebay sell. (I buy sometimes, just not sell). To my shock they went for double the starting price! (I listed them at the price I paid for them just hoping to get my money back) Visualize me now waving peace signs with my fingers over my head and in my best Nixon voice saying "I am not a scalper". Plus we know what Jesus does to scalpers. Apparently Hannah freaking Montana is the hottest thing since sliced bread and I just happened to ride her gravy train all the way to the bank by purely random coincidence.
Oh and the room. It turned out so NICE. It has the peaceful crisp/clean look about it. I still have to add some finishing touches, but all in all I am very happy with all the trouble it was to implement such an overambitious project. That's all for now. More later.

Monday, September 24, 2007

Big ambition = Big messes

 So I don't know if you've ever been six months pregnant and you get that crazy urge that some people refer to as "nesting" but I've got it... and I've got it bad. With that said we (and when I say "we" I mean "me", who then eventually talks hubby into it) decided to make over my bedroom. Our new recent obsession is Santorini Greece. The place looks like heaven. Perched high atop a 400 ft mountainous cliff at the rim of a dormant volcano surrounded by the ocean. This Greek white washed village with ocean blue domes can only be reached by gondola or pack mule. We decided to do our room in these colors (ultra white, blue trim, sky blue ceiling with clouds), which is quite ambitious seeing that we have this large room with a high vaulted ceiling, I'm 27 weeks pregnant, and afraid of heights to boot.

Now we're no painting novices. We've done seven other rooms in our house without a minor mishap. Light colors, bold colors, sponge painting, rag painting, you name it. Home Depot could hire us out practically. Now besides being a major decorative challenge we add into the mix a curious cat, a 2 1/2 year old that likes to "help", a climbing 16 month old. Are we CRAZY, you ask? Probably. Plus, you'd think it'd be one of these suspects to be responsible for some kind of a mess causing ruckus, but alas you would be wrong.

So we started with the bright blue trim around the doors and the indented frame in the wall above our bed. The name of the paint was "Mary's Robe" blue, which I thought was a good omen. How could you go wrong painting with the favorite color of the mother of our Lord and Savior Jesus Christ? The other color we were looking at was called "Filth"... ok actually it was called Firth, but the other made us laugh harder. Most of the trim is done and we are about to move onto the sky blue ceiling. As we move the huge drop cloth over the bed and move the ladder, the entire tray of blue paint unbeknownst to us caught on the edge of the plastic and flipped over like a pancake onto the light beige carpet. We of course didn't discover it for a good 5 minutes when I looked down and gasped in panic. I lifted up the tray to find a GIANT 1 ft radius smurf blue stain on the carpet over 1 inch thick. I felt like throwing up.


Ironically only days before we had talked of buying a shop vac, but at the time had decided to wait. That was the wrong decision. So hubby takes off to buy a shop vac and I try to clean up what I can. Soon he is back and we set up the vac, get out some detergent and oxiclean and turn the bad boy on. To my surprise... the stain starts to come out! As we both watch the blue paint come up we get very excited. Suddenly, hubby says.. I'm getting wet! We turn around to find that there is a huge exhaust spray (blue of course) coming out the top of the shop vac, covering hubby and everything behind him in a 3 foot radius. So now we have stain number 1, which is coming up, and a very large stain number two now soaking in to the carpet. Grrrr. Needless to say it put our paint project on hold for hours as we tried to get the paint up. Two days later the original stain is totally gone, but the secondary stain (which must have gone down into the padding) keeps coming back. At the time I was like, honey, will this be something that's funny later? He's like... I sure hope so. So far we're still waiting.

Thursday, April 12, 2007

The Plasma Chain Reaction


OK, so hubby's been researching, and prepping, and shopping for plasmas for 6 months now. Finally the one he wanted went on sale and he brought it home. So I'm like plasma.. what's the big deal? But after we got it home and I saw the difference between regular and plasma well it's like night and day. Apparently I'm an HD snob now. LOL

Anyhoo.. he didn't just get any ol' plasma. He had to get a BIG one. This stems back to his childhood when his family always had the newest and biggest technology in the neighborhood. All the kids would come over and watch movies on their 6 foot projection TV in the 70's. They were the first ones to own a VCR on the block.. you get the picture.

Little did he know he would set off a huge chain reaction of events - filling our evenings with painting, moving large furniture, buying new furniture, and basically rearranging our whole lives....

Well this big ol' plasma does not fit in our current entertainment center, designed for lowly regular televisions. Oh did I mention we have 9 remotes? That's because we have 9 different VCR's, DVD's, laser discs, stereo stuff, record player, you name it. We're not super rich or anything.. just things he's collected over the last 20 years. (We work in TV so he loves techy stuff)

So I have this huge wall entertainment center that I have to get rid of.. well I think hey, I will make this an armoire dresser for my room that doesn't have enough storage anyway. The small dresser we have I will repaint for the girls room.... so this is the list of things now we are doing.

1. move and paint old dresser to match nursery
2. disassemble entertainment unit and move piece by piece upstairs
3. reassemble it as a bedroom armoire
4. go through all the closets/clothes and reorganize everything
5. paint all the walls in the family room
6. Buy a new armoire/audio cabinet to hold all the equipment
7. Assemble it and load up all the equipment
8. Hire our electrician friend to hide all the wires in the wall
9. Mount our surround sound speakers and hide wires in the wall
10. Rearrange the bookshelf to new room configuration (and all the stuff on them)
11. Buy plasma wall mount and hook it to the wall
12. Go to the dump to get rid of old machines, equipment, boxes... the works
13. Finally enjoy our new room

(this is all while a 2 year old and a 10 month old "watch" and "help"... YIKES

Anyway, I thought it funny that one purchase would change our whole lives and the look of our house!

Thursday, March 16, 2006

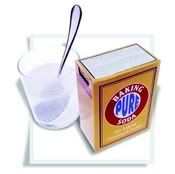
So what's up with Baking Soda?


So I got to thinking the other day about baking soda and it's seemingly endless magical list of things it can do. What IS this crazy white powder and could we as a species manage to live without it now that it's so apart of our everyday lives? If it had been discovered in only recent years the government probably would of swooped down, locked it up in Area 51 and dubbed it "classified" for sure. What other substance can do things like this:


As a toothpaste
As a deodorant
As an antacid
As a facial scrub
A household cleaner
A laundry detergent
A soother of bee stings and rashes
A neutralizer of battery acid in case of spills
A rust remover
An odor neutralizer
A jewelry cleaner
A drain unclogger
A flea killer


And these are just a few. All of this PLUS you can put it in your cakes and cookies to make them light and airy. It just boggles the mind. So the next time you grab for your trusty box of arm and hammer, don't just think you're using boring old Sodium Bicarbonate, but rather you hold in your hand the most wonderful miracle powder that the world has ever seen.
Related Posts Plugin for WordPress, Blogger...